 Welcome Page
Well, if you want to give your participants a nice welcome, go ahead and drag a welcome page into your survey. Adding a Welcome pages is a great way to introduce yourself, your company, or the purpose of the respective survey. Participants always like to know to whom they are giving their feedback and the reason for collecting their opinions.
Welcome pages should not be very overwhelming. When you design them, try not to make them too crowded with information. Participants who are unsure whether they want to take the survey should have some time to relax, read the information, look at pictures you may have included, and then decide to start your survey. Additionally, welcome pages are the best place to provide any additional information, like your privacy policy or links to information your respondents might need.
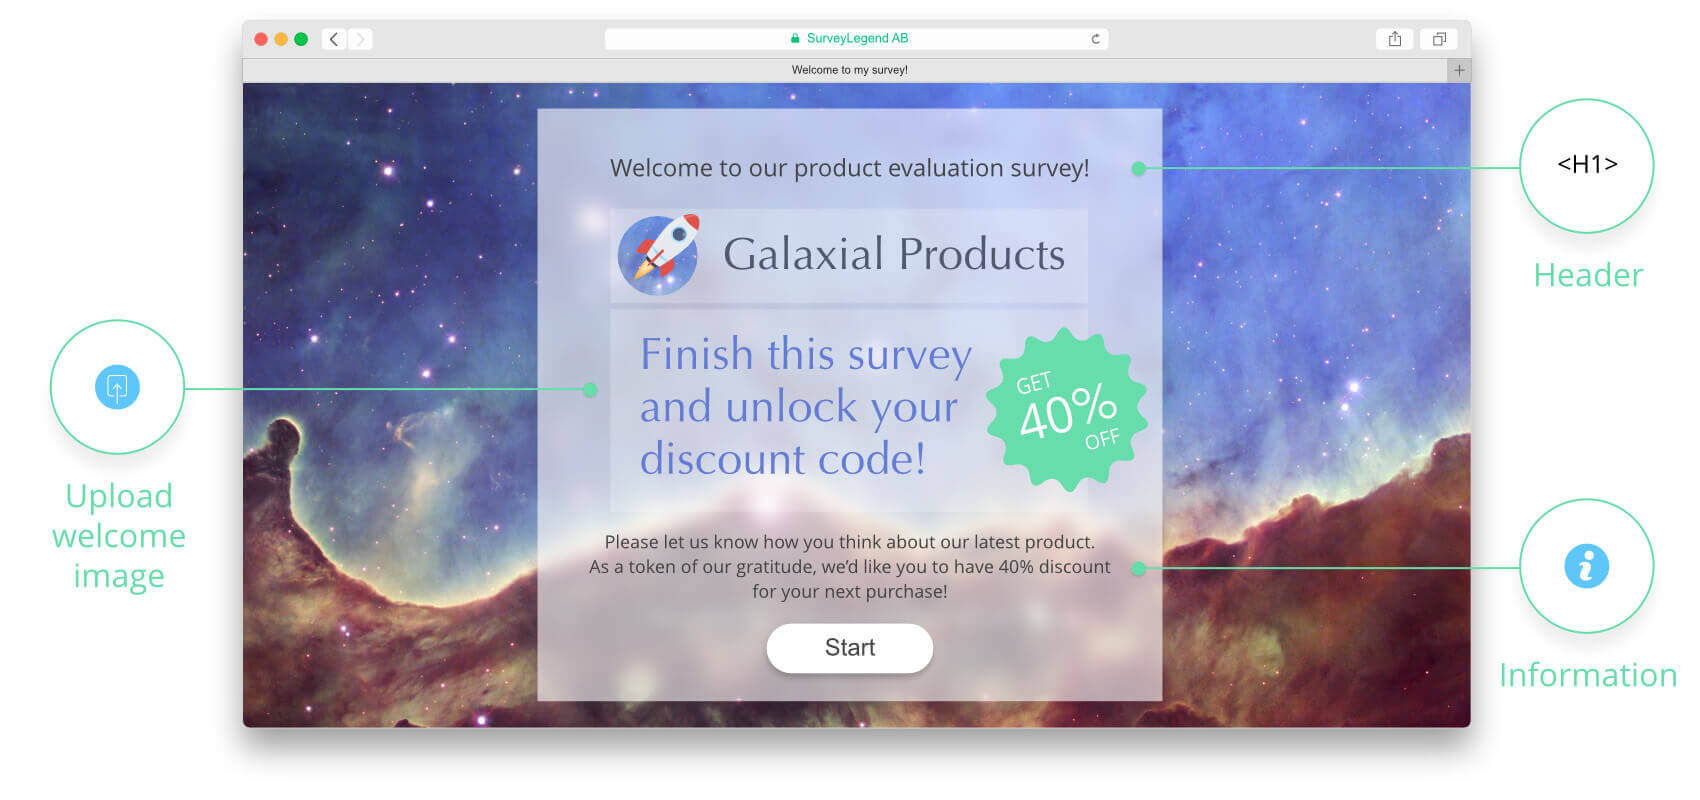
Welcome Pictures can have transparent areas, to provide a more interesting visual effect. They can even act as banners and include incentives or other important information.
The welcome page is a widget that can be used only one time in each survey. The first time you drag it in, it will disappear from the survey fields sidebar. Since it is always the first thing that your participants will see, it will always be placed on top of all the other fields and you cannot drag and drop it between other survey fields.
After adding a Welcome Page to your survey, click or tap on it to activate the Edit Mode and access the settings panel.
You can easily customise the Welcome Page, to in a way that works best for your questionnaire. Text Box offers the following customization possibilities:

Add redirect link for picture

In the welcome page settings, there is an option to “Add picture” this gives you the possibility to upload an image of your choice. This greatly enhances the beauty of your survey, and welcomes your participants in a visually appealing way.
Here is a complete guide about how to optimally use pictures in the welcome pages of your surveys. Make sure you read it and learn to use your legendary powers:
 How to add pictures to the Welcome Page
Also make sure to see this page, and get inspired with examples of using images in suveys, forms, polls, or questionnaires.
Additionally, you can add a custom link to the picture after you upload one. Linked images can act as banners, helping you promote something or add incentives for your respondents to finish a survey. They can also help you create download links, or lead users to other pages or your other surveys. Read more about adding links pictures in your survey.
By enabling “Promote sharing of survey” you enable respondents to share the survey to their social media channels such as Facebook, Google+, Twitter and LinkedIn simply with a click of a button. This can help you get more responses and increase the chance of your surveys and forms going viral.
You can also enable this sharing widget in the Thank You Page of your surveys. In some cases, when you don’t want the respondents to get distracted by launching their social media channels, it might be a better strategy to show the sharing widget at the end of the survey.
Additionally, you can also promote sharing of the survey, if you enable the Public Analytics Page for your surveys or polls.